Pages

Friday, February 20, 2015

Easter Sunday Layout - Doodlebug Design Team Project

Hi there friends - it's my turn up on the Doodlebug blog today to showcase a fun and festive Easter layout featuring the new Easter Parade line. A fun tradition that I have carried on from my own childhood  is to get a fancy new outfit for Easter Sunday. I loved going shopping with my own Mom for a frilly, beautiful dress to wear on Easter - so I had to capture the memory and tradition with my own kids.

I decided to make a little Easter scene along the bottom edge of my layout - I cut a grass border out with my Silhouette and then added some eggs and flowers and jellybean stickers from the Icon Sticker Sheet - Oh and I couldn't resist adding some of the darling animals that come with this line as well - 2 darling girly animals and one handsome little guy - just like my own kids :) Bright Glitter Sprinkles were added for a bit of dimension and sparkle.


A cute little bluebird by a birdhouse sticker added a nice touch on the side of my layout.
 I then topped it all off with a few banner shapes cut from some of the lovely pattern papers and the Easter Sunday title is from the 4x4 Bunny and Friends pattern paper. I love using these for titles - so handy! 
Thank you so much for stopping by! Have a wonderful weekend!

Thursday, February 19, 2015

Cutting Acetate with Silhouette - Lori Whitlock Design Team

Hi friends - today I am here to show you a fun technique using acetate! I am a sucker for cute packaging so when I was pondering about what to do my tutorial on for this month I knew I wanted to share this one with you. I decided to do a couple of colorful St. Patrick's Day Favors to show off this technique. It just wouldn't be the same if you couldn't see the Skittles and Gold Coins that these boxes hold, so when you really want to show off what is inside your packaging or if your treats fit a holiday or a theme like my treats do, acetate is the way to go!  It may seem basic and easy, but it is so fun to use something other than cardstock and pattern paper when using our digital cutting machines.

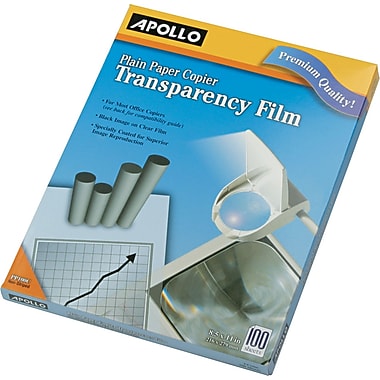
I use this brand of acetate (also know as transparency film) for my projects. It cuts beautifully in my Silhouette machine.  Apollo Transparency Film


Apollo® Plain Paper Copier Transparency Film, Clear, 8 1/2in.(W) x 11in.(H), 100/Box
Here are the steps to my project -
1- Open up Silhouette program. 
2- Find the 2 box cut files and place them in the workspace.
 
When deciding what boxes to use from Lori's library - I chose to use 2 of my favorite boxes to use with acetate. I love these boxes because they require no gluing - which can be tricky with acetate because a lot of the adhesives show through so these boxes were perfect. I used the Santa Petal box (minus the "santa" parts) and the No Glue Gable Box. I used some of Lori's darling Hang Tags well.
 
Links below


3- Since the acetate is fairly thick, I used the textured cardstock settings (Blade Depth 6, Cutting speed 3, Thickness 33. I also checked the Double Cut box to make sure that the cuts are nice and deep and this also helps when you go to fold up the boxes. 
 
Here are the boxes up close - I used Doodlebug Design's Happy Go Lucky line for the paper and stickers.

So my challenge to you is to go pick up some of this fun medium from your local office supply store and try your hand at this fun technique. Thank you for stopping by!

Thursday, February 12, 2015

Hello Sunshine Home Decor

 Hi there Doodlebug friends -today I am here to share with you my Hello Sunshine project. Its been kind of cloudy and gloomy here around my neck of the woods so I though I would cheer up my space with a couple of bright and cheery home decor projects featuring this darling line.
First up is this adorable watering can that I found at my local craft store. It's a perfect container for all the different sizes and shapes of flowers that come in the Spring Flowers craft kit.

 I added some glitter sprinkles, some buttons and some flower sprinkle shapes for fun.

 And how cute is Mr. Snail here along the bottom?
My next project is just a simple frame that I used some of the adorable pattern papers for the background and banners and the sun and cloud stickers with the happy, smiling faces -they add just the right touch! One of my favorite pieces of this line is the rainbow washi tape - I added a strip along the middle of the page with a scallop border punch cardstock strip as well.

 I adore the 4x6 cards that come with this collection. They were perfect for the sentiment that I wanted to frame - I really do love Spring! I added a flower and wheelbarrow sticker to the card as well as some fun sticker letters and a sticker heart. Glitter sprinkle finish the frame off with just the right amount of sparkle :)

Hopefully I have inspired you to use your paper crafting supplies to decorate your home and add a splash of Doodlebug color and happiness to your home! Happy Crafting everyone and thanks for stopping by!

Tuesday, February 10, 2015

Lori Whitlock Blog Hop - Dry Erase "I Love You Because" Frame

  Hi friends - welcome to Lori Whitlock's February Blog Hop! You should have arrived here from Cathy's blog or you can start at the very beginning at Lori's blog.

So in honor of February being the month of Love , I decided to create a fun little dry erase frame that is not only perfect for Valentines Day coming up, but actually for any day. I love Valentines Day, but am sad that it only lasts one day - so I wanted to come up with a fun way to keep the love going all month ( or year) long :)

This project is made with an inexpensive frame and some of my favorite Lori Whitlock cut files and digital papers.I knew when I saw the "I Love You Because" phrase in the shop that it was exactly what I wanted to use. I also added a handmade I Love You card to tie it all together.


 The nice thing with using a dry erase marker, is you can change your saying every day if you want to . This is such  a fun way to tell that special someone what you love about them anytime. I plan on making one of these for each of my kids and maybe the hubby too :) 

I love the 3D hearts on this card. I added a paper bow to the base and then layered 3 hearts that are scored down the middle and layered them on top of each other to make the 3D feature. 
Here is a list of the products I used and you can find them in the Lori Whitlock Shop or in the Silhouette store. I also used some digital elements and papers that can be found on Lori's site on Snap Click Supply. I love using the print and cut feature on my Silhouette to use some of the darling digital elements that Lori designs.
- Digital Papers and Elements -  Be My Valentine Collection
Frame
-Blue Bracket - 7 Labels 2 (LW Shop) (Silhouette Store)
-Small Scallop Square - Vintage Frames  (LW Shop) (Silhouette Store)
-Pink and White Title block  - 4x6 Life Frames 3 (LW Shop) (Silhouette Store)
-I Love You Because phrase - Happy Place Word Art Titles (LW Shop) (Silhouette Store)
-3D Bow - 3D Bows (LW Shop) (Silhouette Store)
Card
-3D Heart Card (LW Shop) (Silhouette Store)
-3D Bow (LW Shop) (Silhouette Store)
- LW Vintage Font (LW Shop

   This week you can get 30% off all the files in Lori's shop using the code: February. Definitely a great deal!

Also - there is a promotion going on over at Snap Click Supply -  30 % off there as well! (Go get some of the darling Be My Valentine Digital shapes and Papers!)
And also because she is cool like that, she is giving away a freebie shape - perfect for this month of love! Head over to her blog to pick it up!

And to top it all of - Lori is giving away a $20 gift card to one lucky winner! Enter for your chance to win!


a Rafflecopter giveaway

Thanks for stopping by and taking a peek at my projects today - your next stop is Chrissy's blog.  Happy Crafting!